Worm composting -- also known as vermiculture -- is the proverbial win-win situation. It gives you a convenient way to dispose of organic waste, such as vegetable peelings. It saves space in the county landfill, which is good for the environment. It gives worms a happy home and all the free "eats" that they could want. For those that have gardens or even potted plants, homegrown compost is a great way to feed and nurture plants.
Worm composting, which some advocates have dubbed "the organic garbage disposal," recycles food waste into rich, dark, earth-smelling soil conditioner. It's such great stuff that Planet Natural sells a variety of organic compost that ranges in price from .95 to .95 as well as potting soil that contains compost.
And despite its reputation, worm composting doesn't need to be a smelly endeavor. If you take care to set things up correctly, your compost bin shouldn't be stinky.
Worm composting is being seen more and more as a way to help our environment and reduce waste. The City of Oakland in California has a recycling program expressly for food waste. (It supplies the bin and you supply the organic garbage.) The City of Vancouver in British Columbia, Canada, supplies residents with worm bins and even has a hot-line you can call to find where to buy worms. Spokane, Washington posts information on how to get started in worm composting to encourage residents to try this environmentally friendly way of disposing of garbage.
To get started you need: worms, a container and "bedding."
Don't go out and dig out night crawlers that live in the soil by your home to populate your compost bin. Night crawlers need to tunnel through dirt to eat and survive and they can't live on vegetable waste. Instead, you need redworms -- Eisenia foetida (also known as red wiggler, brandling or manure worm) and Lumbricus rubellus (manure worm).
You can buy worms from sites like Planet Natural. (We sell 500 red worms for .95 - shipping included.) If you've got the time and the access, you can also find a horse stable and recover worms from horse manure or ask a farmer to ransack his manure pile for worms.
Mary Appelhof, author of "Worms Eat My Garbage" recommends two pounds of worms -- about 2,000 wigglers -- for every pound per day of food waste. (Some experts recommend a one-to-one ratio -- one pound of worms for one pound of garbage.) To figure out how much food waste your household generates, monitor it for a week and divide by seven.
When populating your bin with worms, also keep in mind that worms, provided you give them adequate food and a good home, can double their populations every 90 days. It's probably best to start out with slightly fewer worms than you need and just expect that your worm population will increase to fill your demand for processing organic waste.
You'll also need a container for the worms. We have a variety of worm bins on sale here including the Wormtopia (9.95) and the Can O Worms (6.95).
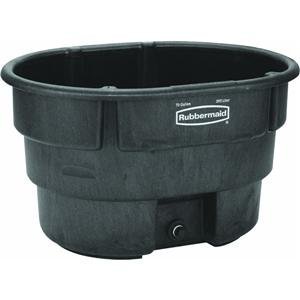
If you prefer, you can also build your own. Size does matter when it comes to compost. You'll want a container with depth of between eight and 12 inches. Wood is a great building material. If you don't feel like building from scratch, you can even adapt a "Rubbermaid" type tub and turn it into a composting bin. Books such as "Worms Eat My Garbage" give details on how to build your own compost bin. Just remember that worms like a dark, moist (not wet) environment and they hate light. Any container should be opaque.
Bins can be located anywhere from under the kitchen sink to outside or in your garage. One important consideration is temperature. Ideally a worm compost bin should be located in areas where the temperatures are between 40 to 80 degrees Fahrenheit. Red worms generally prefer temperatures in the 55 to 77 degree range. If you live in an area that has harsh winters, you'll need to move your bin inside during the winter months or compost on a seasonal basis. Another consideration: worms are like people in that they do not like a lot of noise or vibrations. Keep them away from high traffic areas.
Once you've got the worms and the containers you're ready to set up your "compost shop."
First you'll want to build a home for your worms and one which will make them happy and prolific. You'll need bedding that will fill the bin from one-third to one-half full. To create bedding soak a large quantity of shredded newspapers or cardboard. Worms want an environment that is about 75 percent water. Newspapers should only take a few minutes to take up enough water to make proper bedding. Allow cardboard, such as toilet paper rolls and tissue boxes, to soak overnight. Don't use garden soil or mix fresh cow, horse or chicken manure into the bedding. These emit gases and will raise the temperature of your compost bin. You could end up "cooking" your worms to death.
Once the bedding matter has been soaked, wring it out until it is moist, but not dripping. Place it in the bin along with something gritty such as a bit of soil, fine sand, leaves, cornstarch, sawdust or ground egg shells. (Worms don't have teeth so they need something gritty to help them grind up the paper and food.) Once your bin is up and running it will be self-sufficient and you won't need to add additional grit until you harvest the worm castings and clean the bin.
To make your worms feel at home, dig down until about the middle of the bedding and place your worms there. Don't just put them on top. Then place the lid on the bin and keep it at a moderate temperature. Leave them alone for about a week to settle in. They will feed off the bedding.
After about a week, start feeding your worms food scraps such as fruit and vegetable peels, pulverized egg shells, tea bags and coffee grounds. Avoid meat scraps, bones, fish, leftover dairy products and oily foods since these will make your compost pile smell as well as attract flies and rodents. Experts are divided on whether pasta and grains should be tossed into the compost or thrown away in regular garbage. Your best bet is to experiment and let your worms tell you what they'll eat or won't eat.
Of course, there are certain things that worms won't eat or shouldn't eat. Do not dispose of glass, plastic or aluminum foil in your compost. Although paper can be used as bedding, don't include paper with colored printing on it. Many colored inks are toxic to worms. Also avoid rubber bands and sponges.
It's best to feed worms once a week in small amounts. If you feed them more than they can process you will end up with a stinking compost bin as the garbage literally backs up.
Compost actually doesn't smell. The foul odor comes from rotting food that the worms haven't eaten yet. If you give them appropriately sized meals -- not supersized entrees -- they will eat the food before it starts rotting (and smelling.)
If they are eating too slowly, chop up vegetable matter, which is easier for them to eat and gives new meaning to the term "fast food." If the chopping doesn't help enough, reduce the amount of organic matter you are feeding them.
When you feed your worms, check and see how things are going. If the bedding is wet, give some additional paper bedding to soak up the excess. (Remember that the bedding should be moist, not dripping.) If the bedding is too dry, use water from a spray bottle to moisten it.
Once your compost bin is up and running, it requires little maintenance until little or no original bedding is visible and the contents of the bin are reduced in bulk and mainly consist of worm castings, which are brown and "earthy" looking. Once your bin has reached that point, it's time to harvest the worm castings and give your worms new bedding. Castings can be harvested anywhere from two and a half months to every six months, depending on how many worms you have and how much food you're giving them.
There are several harvesting methods. For those with the time and patience or little kids, you dump the bin's contents onto a large plastic sheet and then manually separate the worms from the compost. Children usually love helping out with harvesting the worm casings. Remember that your helpers as well as yourself should wear gloves. Once all the worm casings are removed, keep aside some of the compost to mix in with the new bedding and then the cycle starts all over again.
A more common way to harvest is to move everything - worms, castings, bedding, food - to one side of the bin. Pick out partially decomposed materials and push to the other side. Place some food on top of the partially decomposed materials. Replace the lid and leave it alone for a couple weeks. During that time, the worms should migrate over to the new food. Once they've gone to the other side, put on a pair of gloves and harvest the castings. Make sure you don't remove any worms in the process. Then give the worms new bedding mixed in with some residual compost.
Compost is useful whether you have an apartment adorned with potted plants or you have a backyard garden. Use compost to enrich potting soil and the soil in your garden. It also makes great mulch. It's relatively hassle-free and you're not only helping your plants, but the environment as well.
Common Problems and Solutions
Problem: Strong, unpleasant odors from the compost bin.
Solutions: Most likely the odor is from rotting food because you are giving your worms too much to eat and food is sitting around too much so it rots. The solution is to stop adding food waste until the worms have broken down what they have. (Also avoid meat and other greasy food which can cause odor problems.) If odor becomes a problem, also try stirring the contents of your compost pile. That will allow more air in, which can also reduce odors. At the same time you are exploring those solutions also check your bin's drainage holes to ensure they are not blocked and drill more holes if necessary. Worms will down if the bin's contents are too wet.
Problem: Worms are crawling out of the bedding and onto the sides or lid of the bin.
Solution: The bedding may be too acidic which is forcing the worms to migrate. Bedding can become too acidic if you add too much acidic food scraps such as orange peels. Try reducing the amount of acidic organic matter that you're putting into the bin.
Problem: Fruit flies.
Solution: Avoid the problem in the first place by burying food waste and not overloading your worms with too much food. You can also try keeping a plastic sheet or a piece of old carpet or sacking on the surface of the compost bin. If flies persist, consider moving the compost bin to a location where the files will not be a problem. Also think about recruiting a few friendly spiders to take up residence near the compost bin.
Last Minute Tidy Cat Coupons Gluten Free Bisquick Mix Buy Now Great Deals 1964 Pac Sorel Boots